
We’re not the biggest party peoples here at Full Fork Ahead, but we figured you might be, and maybe you’d be interested in some appetizer recipes for hungry guests. Even if we don’t party till dawn (occasionally we get to midnight - woohooo…), one thing my own family does enjoy are finger foods. We do hor’deurve dinners at our house every so often, piling our plates with tiny bites of this and that. Kind of like when you do breakfast for dinner, finger foods at the family table instead of a heavy meal can be a fun and different change-up from the norm. This is a night that even our picky kidlet of a daughter will join in enthusiastically, when we make sure to include kid-friendly appetizers, that is. This one that follows may not exactly be the best ones for kids (But who knows, maybe your kids are more eclectic than mine?), but it sure was a hit with the adults.
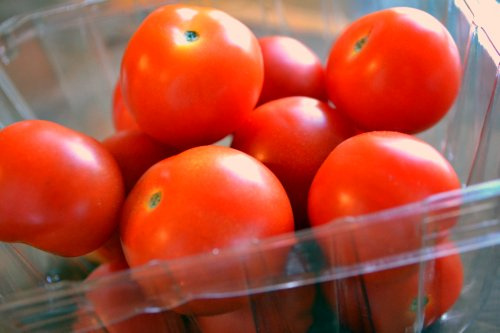
At first I wasn’t sure I’d even be able to find decent cherry tomatoes this time of year, but the grocer, like usual, came through and I picked up these tasty beauties to sacrifice to our stomachs.
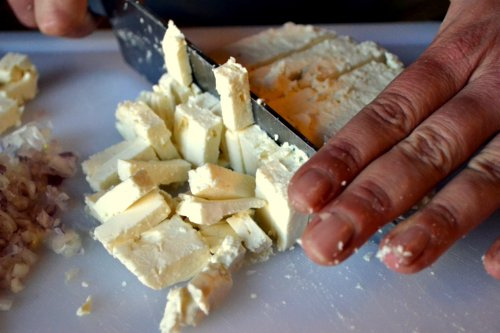
A 7-8 ounce block of feta is cubed up next. The recipe calls for it to be cubed, but for anyone familiar with feta, it’s normally a very crumbly-textured cheese. There are more firm kinds, but the more we worked with this feta, the more it broke down. This actually worked fine for us, and I say just let it crumble. I liked the end results with the crumbled feta better than the few that stayed in a nice, neat cube.
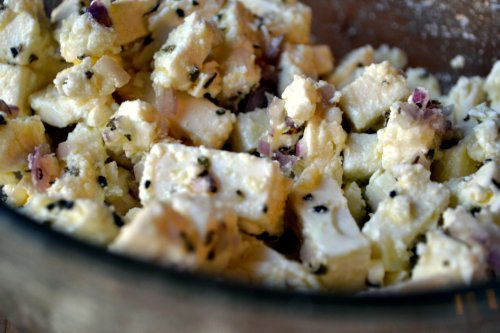
Next, marinate your feta. Mince some shallots (the ones that look like baby onions, not the long thin green and white ones), throw in a little olive oil and some oregano, and you’re set. Pop it in the fridge and let it sit for a bit. We ended up marinating ours for about an hour. I was so surprised at how much flavor the feta absorbed. It’s such a strong flavored item itself, and I was skeptical that it would absorb much if any flavor from the shallots and oregano.
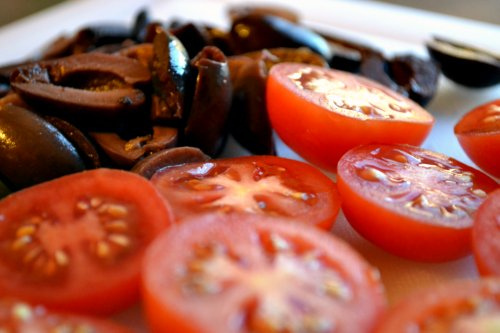
While your feta is marinating, slice each cherry tomato in half and then slice some pitted kalamta olives in half as well. You’ll slide an olive half inside each tomato as well. Feta and kalamta olives - YUM.
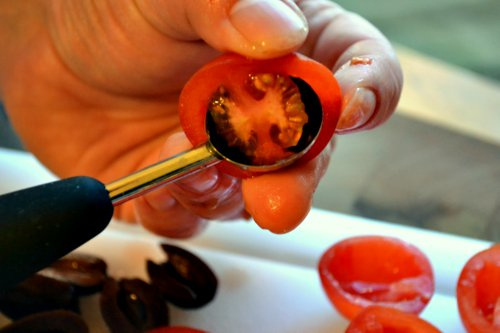
Use a melon baller to scoop out the innards, leaving that thin meatier portion of the inside of the tomato intact. You only want to remove the pulpy, juicy part and the seeds. Or, as I came to think of it, the part that looks like, well, a brain.

Sprinkle each cherry tomato half with salt and pepper, scoop in a tiny amount of the feta mixture, slide in an olive half, then drizzle the finished bites with olive oil and serve. These tiny mouthfuls of salty, tangy cheese and olives and sweet tomatoes are wonderful. So fresh, so irresistible.
Being so small, it seems like these would get tedious to make, but I had plenty of ingredients leftover to make more for us the next day, and once you get the hang of the melon baller it really doesn’t take much time. Speaking of time, there’s no cooking involved - suuhweeeet! - so it’s really only prep time. Hope you enjoy these!
Cherry Tomatoes Stuffed with Marinated Feta
Prep Time: 30 minutes - 1 hour Cook Time: None! How awesome is that? Level: easy Serves: 6-8
- 1 7- to 8-ounce package feta cheese, cut into 1/2-inch cubes
- 2 tablespoons extra-virgin olive oil plus additional for drizzling
- 1 tablespoon minced shallot
- 1/2 teaspoon chopped fresh oregano
- 1 pound large cherry tomatoes
- 1/2 pound pitted Kalamata olives, halved lengthwise
Notes:
There was no suggested time for marinating the feta, so we resolved to marinate ours at least 30 minutes, but ended up marinating it for an hour and were very pleased with how it came out. There was plenty of feta leftover, and the next day it tasted even better. If you want to marinate the feta ahead of time, I’d say it’s safe to do it a day ahead or overnight.
If you look at the photo above of me scooping out the tomato halve with half, notice that I started at one of the strong membranes that attaches to the outer-most inside of the tomato. Starting there, round the scoop around the inside of the tomato, lifting the pulp and seeds out in one scoop. Coming at those stronger membranes from the side tended to want to tear the tomato. If you hold your thumb over the other side of the tomato where the melon baller will come out and up from the scooping motion, it’ll help to cut the other membrane as well. Once you get that motion down, what turned out to be the busiest part of making these went by pretty fast.
You might be left with a few kalamata olives and some feta - we didn’t find this to be a chore and had no problem snacking on them after the tomatoes were gone.
Last but not least, I couldn’t get fresh oregano - booo - so we used dried. Worked just fine! Although I bet fresh would be that much more awesomer.


What patience you have to scoop out the insides of each little cherry tomato half! These little miniature bites look adorable.
You’re right, it does take some patience. I think doing busy work like that, though, is one reason I like cooking so much. Gives me something a little less “life hectic” to focus on for a bit. I was wondering while I scooped them out if they would taste good enough to be worth the effort. Turns out they very much are!
I love little appetizers like this!
My two cents on the fresh oregano is that a very good quality dried oregano (like your own!) is just as good if not more flavorful than fresh. It’s just one of those herbs that I think improves with drying. I say this from experience, because I grow my own oregano. I do use it fresh in the summertime and it does add flavor and freshness to a dish. I dry bunches of it myself in the fall for use throughout the winter, and the flavor is amazing. Even more intense and fragrant than when it’s fresh. I’m not so sure about store-bought dried oregano, though, because I haven’t used that in years!
Christine, thanks so much for your opinions on the oregano! I’ve never used it fresh, only store-bought dried. I think the store-bought dried is one of the most flavorful of the store dried varieties, too, so I’m thinking we’re on the same page. Although, must say, I’m impressed you grow and dry your own!
I love buying fresh herbs, but might get into growing some one day as well. But the stores around here have never had fresh oregano. We have a fairly new gourmet store, thinking they might have it, I just didn’t have time to check before putting these together.
You should definitely grow your own herbs. It’s so easy and so many of them are extremely productive. Once you’ve had the perennial ones for a year or two, they take off and you’ll be giving away little plants to your friends and family.
I may blog about herb gardening in the spring. I’ve wanted to post more about gardening stuff and I will be re-establishing my herb garden, so it would be a great time to talk about it on my blog. And take pictures, too!
I’d love to read about your herb gardening. Is spring-time the ideal time to start one?